The following article describes the ordering process for Swyx Meeting. With Swyx Meeting you can start your online meeting directly from your browser without having to download or install any additional software..
Orders for Swyx Meeting are always placed via the Swyx Operator, the new order tool from Swyx. The necessary login data must be requested via the Swyx Partnernet.
After you have received the login data as a Swyx Partner, log in to the Swyx Operator at the URL https://operator.swyx.com . It is important that you order in the context of the customer for whom you want to order Swyx Meeting. How to create customers in advance is explained in the webcasts available in the Swyx Partnernet.
Note: Input fields in the order street which are marked with an orange bar on the left are mandatory fields and must be filled.
Step 1: Start the order process

- Start the order process by clicking on Ordering in the menu and then on Swyx Meeting.
Note: Then check that the Customer field contains the customer for whom you want to order Swyx Meeting. Detailed information on how to select the right customer context can be found here.
Step 2: Stocktaking

In the first dialog of the order process (also called Order Street), please enter the following data:
- Customer: Select the customer for whom you want to order Swyx Meeting, if this has not already been done. Check that this field is correctly filled (further notes).
- Portfolio: Leave this field on the default Swyx Meeting.
- Reference: Enter a reference of your choice here to identify the order for your customer. This reference text will be displayed on invoices to make the assignment easier for you.
- Delivery date: With the delivery date you determine when Swyx Meeting will be activated for use by the user and a welcome mail with further explanations will be sent. At the same time the Swyx Meeting usage will be invoiced.
- Press the button Next Step to go to the next order step.
Step 3: Subscription

In this ordering step you can choose between the products Swyx Meeting 2 and Swyx Meeting.
- Swyx Meeting 2: With Swyx Meeting 2 you can hold an online meeting with your counterpart. More participants cannot be added.
- Swyx Meeting: With Swyx Meeting up to 10 participants can participate in an online meeting, i.e. you and 9 other people.
- Finish the selection with Next step.
Step 3a: Proof of Authorisation (only for Swyx Meeting 2)

Only if you have selected the Swyx Meeting 2 product in the previous step will the above dialog appear. As Swyx Meeting 2 is provided free of charge with appropriate requirements, you need to confirm the following information and conditions:
- Contract reference: Enter the corresponding contract reference here. Where to find it is explained in the linked PDF (see arrow in screenshot).
- Checkbox: Click on the checkbox to accept the terms and conditions.
- Click Next Step
Step 4: User

Swyx Meeting is always provided to an end user of an end customer. This means that Swyx Meeting is typically used by a SwyxWare user. In this step you configure for which user Swyx Meeting should be deployed.
- User: If WebUsers have already been created and Swyx Meeting is to be made available to them, you can select them here and link them to the order. Alternatively leave the preselection as it is and click on the following checkbox to create a new user.
- New User: Tick this checkbox to create a new WebUser to which Swyx Meeting should be made available. This is the usual use case, i.e. you configure here the e-mail address etc. of a SwyxWare user who should use Swyx Meeting.
- Displayname: Enter the name of the user here. Typically you will enter the name of the SwyxWare user here.
- Firstname: Optionally you can enter the first name of the user here.
- Prefix: Prefixes in the name of users can be entered here.
- Lastname: Optionally you can also enter the last name of the user here.
- E-Mail: Enter the e-mail address of the user here. The welcome e-mail will be sent to this e-mail address on the delivery date (see above). The user must also log in to the Swyx Meeting service with the e-mail address specified here.
- Language: Configure the language of the user from the default selection.
- Click Next Step
Step 5: Confirm

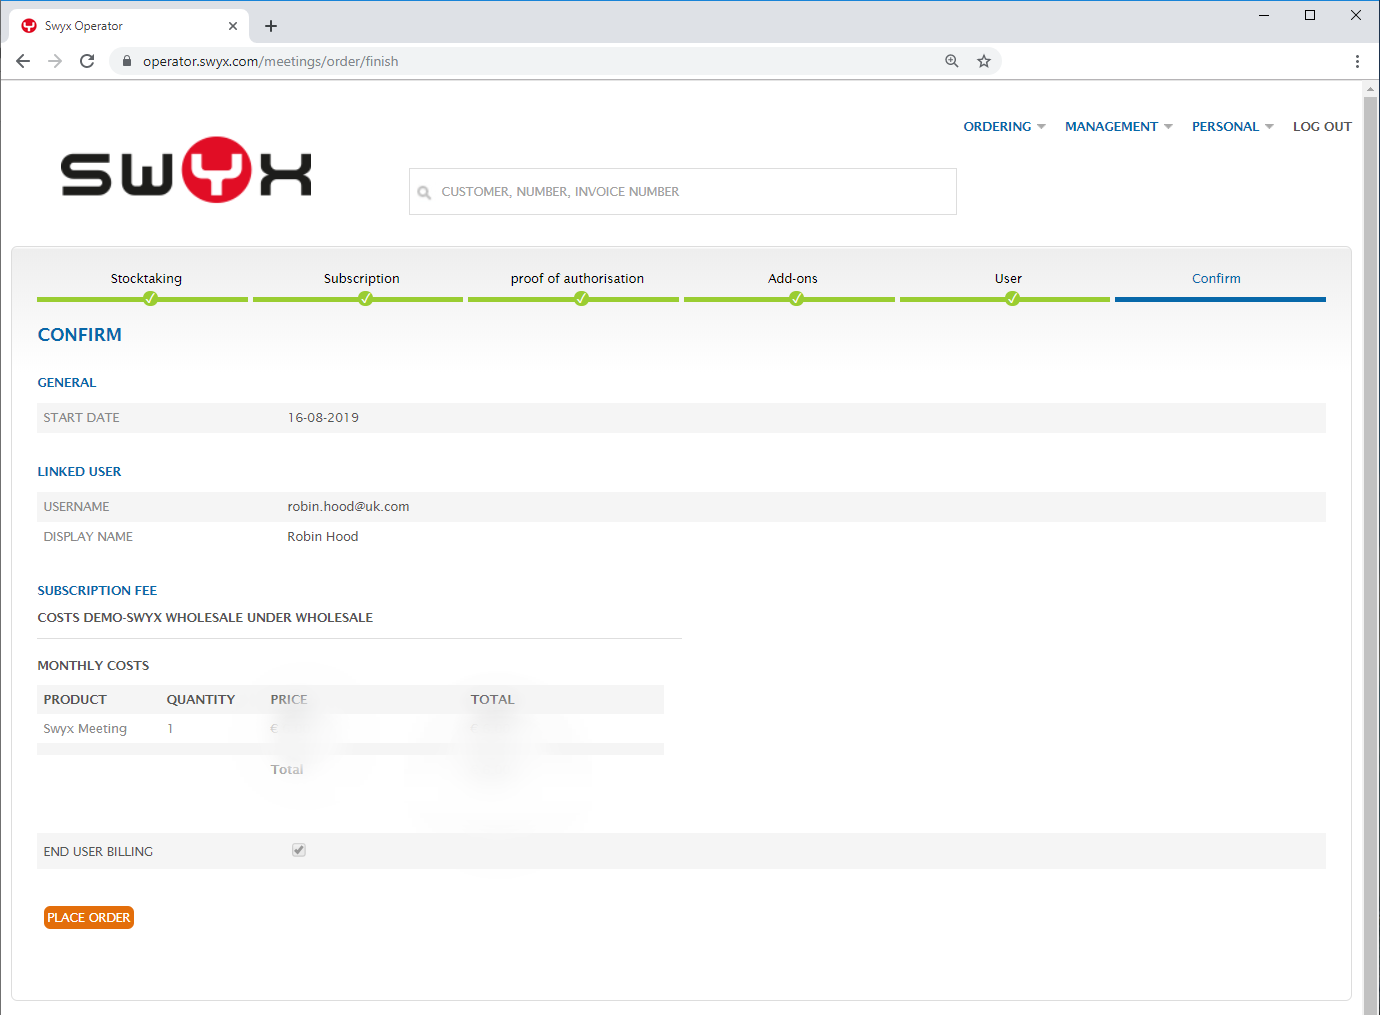
At the end of the order process, you will receive an overview of the data entered, including calculation of the monthly costs. On the left side you will see as Swyx Partner your purchase prices, which Swyx will charge you monthly. If the start date of the order is within one month, this start month will only be charged proportionately.
- Click the Place Order button to complete the order. The Welcome Mail will then be sent to the end user on the delivery date and Swyx Meeting can be used from that date.
Comments
0 comments
Please sign in to leave a comment.